
Table of Contents
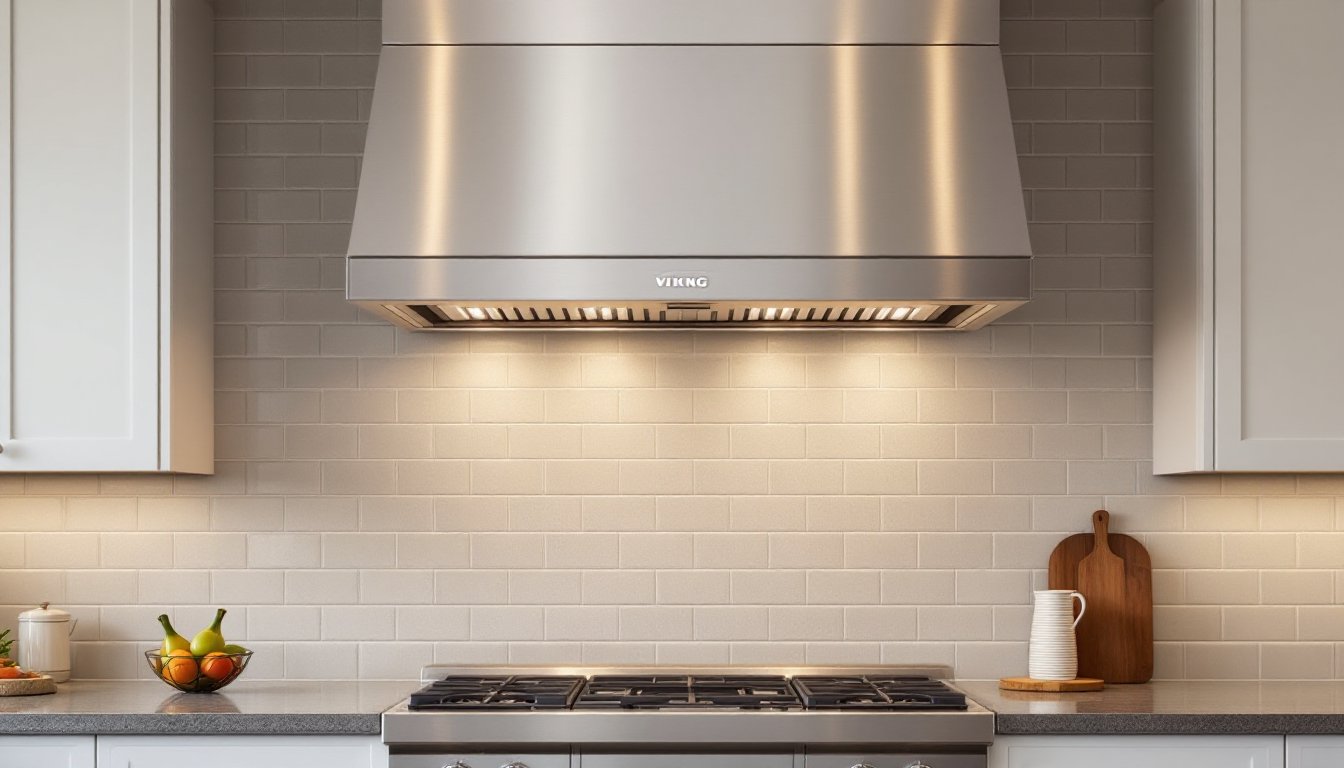
ToggleA quality range hood isn’t just another kitchen appliance, it’s the backbone of a functional cooking space. A Viking range hood pairs professional-grade performance with residential reliability, making it a top choice for homeowners who take their kitchens seriously. Whether you’re renovating, upgrading, or building from scratch, understanding what makes a Viking hood different helps you invest wisely in ventilation that actually works. This guide walks you through the features, installation considerations, maintenance routines, and how to pick the right model for your needs.
Key Takeaways
- A Viking range hood delivers professional-grade ventilation with commercial-grade stainless steel construction and higher CFM ratings than standard residential hoods, clearing smoke and odors faster during high-heat cooking.
- Choose the right CFM rating based on your burner output—roughly 100 CFM per 10,000 BTU—and opt for ducted ventilation over ductless models for superior performance in active cooking spaces.
- Proper installation requires positioning the hood 28–36 inches above the cooking surface and routing ductwork carefully to minimize bends; hire a professional for structural modifications to avoid fire hazards and energy loss.
- Clean or replace filters monthly for standard hoods and every 3–6 months for carbon filters to maintain CFM efficiency and prevent the motor from working harder than necessary.
- Viking range hood models range from entry-level ($1,200–$2,000 with 400–600 CFM) to high-end professional styles ($5,000+ with 1,000+ CFM), so match the model to your cooking habits and kitchen layout rather than oversizing.
- Regular maintenance—including stainless steel cleaning, damper inspection, and annual motor checks—extends your hood’s lifespan and ensures optimal ventilation performance over a decade-plus lifetime.
Why Viking Range Hoods Stand Out in Premium Kitchen Design
Viking’s reputation in the kitchen appliance space isn’t built on marketing alone. Their range hoods combine industrial heritage with practical engineering. Most Viking hoods come with stainless steel construction, that’s commercial-grade material that resists fingerprints, corrosion, and daily wear better than painted steel or plastic-trimmed models.
The brand’s ventilation systems typically deliver higher CFM (cubic feet per minute) ratings than standard residential hoods, meaning they move more air volume and clear smoke, odors, and steam faster. If you’re serious about cooking, especially high-heat techniques like searing or stir-frying, that difference is tangible. Many homeowners appreciate that Viking hoods are designed to coordinate visually with Viking ranges, creating a cohesive cooking zone rather than a mismatched collection of appliances.
Beyond aesthetics, these hoods are engineered for durability. Commercial-style dampers, heavy-duty fan motors, and replaceable filters mean you’re building in longevity rather than replacing a worn-out hood in five years. That upfront investment pays dividends over a decade-plus lifespan.
Understanding Viking Range Hood Features and Technology
Viking range hoods come in several configurations, each suited to different kitchen layouts and cooking styles.
Ventilation Styles and Capacity
Understanding CFM helps you size the hood correctly. Viking hoods typically range from 300 to 1,200+ CFM depending on the model. As a rule of thumb, you need roughly 100 CFM per 10,000 BTU of burner output, though the equation varies with ducting length and kitchen layout. A 48-inch professional-style range with 60,000 BTU capacity might need a 600 CFM hood minimum, though many cooks prefer closer to 800–900 CFM for aggressive cooking. Consult your specific range’s spec sheet and kitchen ducting setup, undersizing leads to inadequate ventilation, while oversizing wastes energy and creates noise.
Most Viking hoods offer ducted (vented to exterior) or ductless (recirculating with carbon filters) operation. Ducted is always the superior choice for active cooking. Ductless models are a fallback for apartments or retrofits where exterior venting isn’t possible, but they trap odors and moisture far less effectively.
Controls and Convenience Features
Many Viking hoods feature variable-speed fan controls, so you can dial in gentle ventilation for light cooking or max power for high-heat projects. Some models include heat lamps, task lighting, or integrated sound dampening, worth evaluating based on your kitchen’s layout. Electronic controls are common on higher-end models: mechanical knobs are simpler and often more reliable long-term, though they offer fewer adjustment gradations.
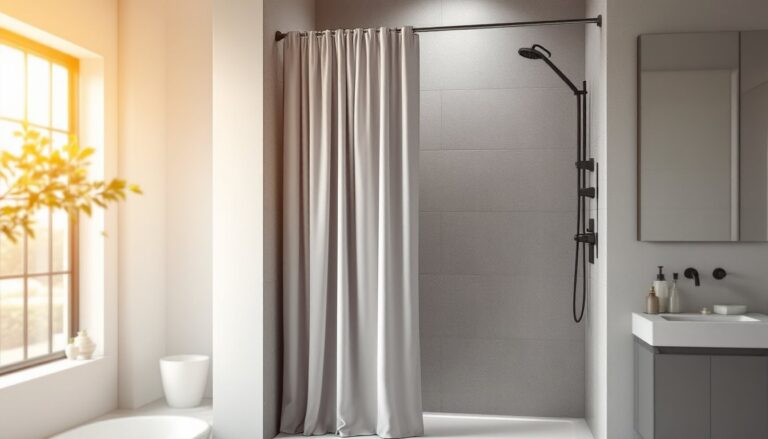
Installation and Placement Considerations for Your Kitchen
Hood placement and ducting are non-negotiable for performance and safety. Proper installation requires careful planning, and some aspects warrant professional help.
Positioning and Clearance
The hood should sit 28–36 inches above the cooking surface for most residential ranges, though consult your specific model’s manual, some require different clearance. Too high, and it won’t capture rising heat and steam effectively: too low, and it becomes a safety hazard or hits pots and pans. Island hoods, wall-mounted units, and under-cabinet models have different installation footprints. If you’re installing a new hood where none existed, verify that wall studs or ceiling joists can support the weight (most weigh 75–150 pounds) and plan ducting runs early.
Ducting Essentials
Ducting size, routing, and termination heavily impact performance. Most residential hoods use 6-inch or 8-inch flexible or rigid ductwork. Minimize bends and length: every 90-degree elbow reduces airflow. Ductwork should exit through the exterior wall or roof with a dampered termination cap that prevents backflow and pests. Routing ductwork through attic or wall cavities requires proper insulation and clearance from electrical and plumbing, this is where most DIYers need a second set of hands or a licensed HVAC technician. Building codes often require permits for duct work and exterior penetrations, especially if you’re modifying structural elements.
When to Call a Professional
If your ducting involves cutting joists, running ductwork through finished spaces, or exterior wall modifications, hire a contractor. Improper installation creates fire hazards, energy loss, and poor ventilation. Budget $500–$1,500 for professional installation of a new hood and ducting, depending on complexity.
Maintenance and Care Tips to Keep Your Hood Running Smoothly
Regular upkeep keeps your Viking hood performing as designed and extends its lifespan.
Filter Maintenance
Grease filters are the most critical maintenance item. Standard aluminum mesh filters should be cleaned monthly if you cook frequently. Soak filters in hot, soapy water (or run them through the dishwasher on a hot cycle) and scrub away accumulated grease. If you use ductless/recirculating models with carbon filters, replace them every 3–6 months depending on use. Clogged filters cut CFM by 20–40%, killing ventilation efficiency and forcing the motor to work harder.
Exterior Cleaning
Wipe down the stainless steel exterior with a soft cloth and mild detergent monthly. For stubborn grease buildup, use a stainless steel cleaner designed for kitchen appliances. Avoid abrasive pads, which scratch the finish. Check the damper (the flapper inside the exterior vent) once yearly to confirm it opens and closes freely, debris and ice can jam it.
Motor and Fan Inspection
Listen for unusual grinding or squealing noises, which indicate worn bearings or obstructed fan blades. If noise levels increase, have a technician inspect the motor. Annual inspections by an HVAC pro (or a handy homeowner with access to the ducting) catch loose fittings, damaged ductwork, or debris buildup before they become serious problems.
Comparing Viking Range Hoods: Finding the Right Model for Your Kitchen
Viking offers models across a range of sizes and price points. Picking the right one depends on your cooking style, kitchen layout, and budget.
Model Categories
Entry-level Viking hoods start around $1,200–$2,000 and provide solid stainless steel construction and 400–600 CFM ventilation, adequate for moderate home cooking. Mid-range models (around $2,500–$4,000) bump up CFM to 700–900, add variable speed controls, and often feature integrated task lighting. High-end professional-style hoods (often $5,000+) deliver 1,000+ CFM, commercial-grade dampers, and integrated controls designed to match professional-depth ranges.
When shopping, look at product reviews from trusted sources like Good Housekeeping, which tests appliances thoroughly and notes real-world performance. Confirm the CFM rating matches your cooking habits and burner output. Island hoods cost more than wall-mounted models due to ducting complexity and structural support requirements.
Comparing Ducting Requirements
Before committing to a model, verify what ducting it needs and whether your kitchen can accommodate it. Bob Vila offers detailed renovation advice on kitchen exhaust planning. A hood needing 8-inch ducting routed through finished ceilings is more expensive to install than a 6-inch model with a direct wall exit.
Resale Value
A premium hood like Viking pairs well with an upscale range or kitchen remodel and may improve home appeal. But, a $4,000 hood in a modest kitchen doesn’t necessarily yield dollar-for-dollar return on your investment, match the hood to the scope of your project. The Kitchn regularly covers kitchen appliance selections and the logic behind upgrade priorities, helping homeowners balance desire with practicality.
Conclusion
A Viking range hood is an investment in kitchen performance and durability. Choose the right size and CFM for your cooking needs, plan the installation carefully (and hire help when needed), and maintain filters and ducting to keep it running smoothly. The result: a kitchen that ventilates efficiently, smells fresh, and stays comfortable during serious cooking sessions.