Table of Contents
ToggleA walk-in shower splash guard is one of those practical upgrades that sits somewhere between necessity and smart design. If you’ve ever watched water spray beyond your shower enclosure, soaking the bathroom floor and creating a slip hazard, you already know why these guards matter. Whether you’re dealing with a frameless shower opening or looking to prevent water damage to adjacent walls and flooring, a proper splash guard solution keeps moisture contained without cramping your shower space. This guide walks you through what splash guards are, why they’re worth installing, the different types available, and how to get them in place correctly.
Key Takeaways
- A walk-in shower splash guard is a partial barrier made of glass or acrylic that controls water spray and prevents moisture damage to bathroom floors, walls, and fixtures.
- Installing a splash guard prevents silent water damage like mold, mildew, and rotting subflooring while reducing slip hazards and extending the life of bathroom finishes.
- Frameless glass panels offer a sleek modern look ($400–$1,200) and excellent water containment, while framed or pivot-style guards ($300–$900) provide easier installation and better structural support in imperfect bathrooms.
- Proper installation requires precise measurements, a diamond-core masonry bit for drilling, stainless steel fasteners, and silicone caulk sealing—skipping these steps compromises effectiveness and durability.
- Regular maintenance with a squeegee, vinegar-water cleaning, and quarterly caulk inspections will keep your splash guard functioning for 10+ years without failure.
What Is a Walk-In Shower Splash Guard?
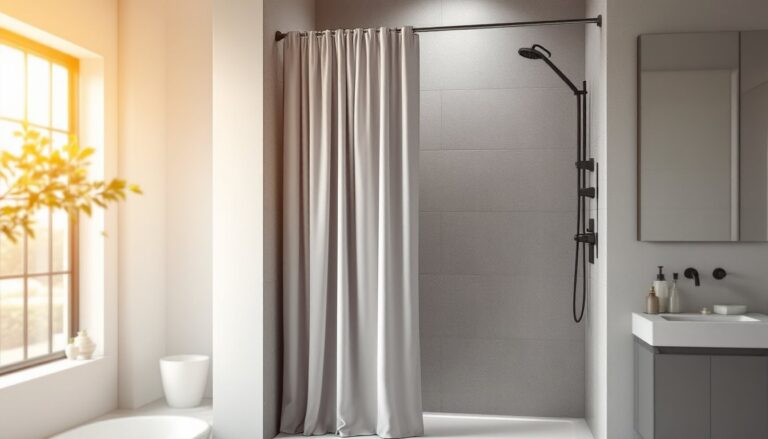
A walk-in shower splash guard is a barrier, usually made of glass, acrylic, or sometimes flexible materials, designed to control water spray and redirect it back into the shower area. Unlike a full enclosure that completely surrounds the shower, a splash guard is typically a partial panel or screen positioned at strategic points where water tends to escape. The term covers everything from a simple frameless glass panel positioned perpendicular to the shower opening to pivot-hinged guards and even flexible splash curtains that attach to the ceiling or wall. The core job is the same: stop water from pooling on your bathroom floor and protect drywall, tile, and fixtures from constant moisture exposure. Walk-in showers are popular in modern homes because they feel open and spacious, but that openness comes with a trade-off, water doesn’t naturally stay contained. A well-chosen splash guard solves that problem while maintaining the clean, minimalist aesthetic you wanted in the first place.
Why You Need a Splash Guard for Your Walk-In Shower
Water damage isn’t always dramatic, often it’s silent. When shower spray consistently wets the bathroom floor or adjacent walls, you’re looking at potential mold, mildew, and rot in framing and subflooring. Drywall absorbs water like a sponge, and even with bathroom-grade paint and sealers, repeated moisture exposure weakens it over time. Grout between floor tiles can deteriorate, especially if the subfloor beneath stays damp. Beyond structural concerns, wet tile floors are slipping hazards, and soggy bathroom rugs wear out fast. A quality walk in shower water guard prevents these issues before they start. It also extends the life of your finish materials, the paint, caulk, and tile stay intact longer when they’re not constantly battling humidity and standing water. From a practical standpoint, you spend less time mopping up after every shower, and your bathroom floor stays safer for kids, elderly household members, and anyone else who might slip on wet tile. Installing a splash guard is preventive maintenance that pays dividends.
Types of Splash Guard Solutions
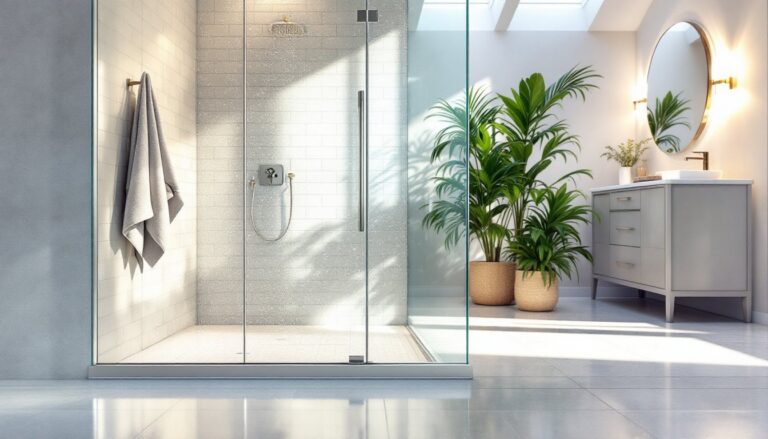
Frameless Glass Panels
Frameless glass panels are the gold standard for walk-in showers because they look sleek and let light through without interrupting your sightline. A typical frameless setup uses ¾-inch tempered glass (the standard thickness for safety and rigidity) positioned perpendicular to the shower opening or angled inward. The glass is usually fixed to the floor with a hydraulic hinge or clamp system that allows it to swing slightly, containing spray without creating a full enclosure. Installation requires precise floor anchors bolted into the tile or concrete subfloor, this isn’t a project for the impatient. You’ll need a masonry bit, proper fasteners rated for your floor type, and a level to ensure the glass doesn’t tilt. The payoff is a clean, modern look and excellent water containment. Prices typically range from $400 to $1,200 depending on glass thickness, size, and hardware quality, plus installation costs if you hire a professional. Frameless panels do show water spots and soap residue more visibly than framed options, so maintenance involves regular squeegee use and periodic cleaning with glass-specific cleaner.
Framed and Pivot-Style Guards
Framed splash guards use an aluminum or steel frame around the glass, providing extra structural support and a finished appearance. These work well in older bathrooms or spaces where you need additional rigidity. Pivot-style guards, sometimes called “swing-out” panels, mount on a hinge system and swing inward during shower use, then push back against the wall when not in use. This design is clever for tight bathrooms where you want to preserve floor space. Framed options are generally easier to install than fully frameless setups because the frame channels guide the glass and reduce alignment demands. They also tend to be more forgiving if your bathroom floor isn’t perfectly level. Prices fall in the $300 to $900 range depending on frame material and size. One trade-off: frames collect soap scum and hard water deposits in the channels, so they require more regular cleaning. Both frameless and framed panels demand tempered glass for safety: never attempt to use standard window glass in a shower where it could shatter and cause injury. Curbless showers and splash guard designs often work together to create seamless, low-maintenance wet areas if you’re considering a larger renovation.
Installation Tips and Best Practices
Before you drill any holes or order glass, measure your shower opening twice and photograph the space from multiple angles. Mark where water currently escapes, this tells you exactly where to position your guard. Check that your floor is level using a 2-foot level: if it’s out by more than ⅛ inch over 10 feet, you’ll need to shim or adjust your anchor points. Inspect the subfloor condition, especially in older homes: soft or spongy spots mean moisture has already done damage and you need to address that before installing a guard.
For frameless glass panels, the critical step is drilling accurate mounting holes into tile or concrete without cracking surrounding material. Use a diamond-core masonry bit (not a standard drill bit), apply steady pressure, and keep the area wet, this reduces heat buildup and drill wandering. Pre-mark holes with painter’s tape to prevent the bit from slipping. Use stainless steel fasteners rated for wet environments: regular bolts corrode quickly in bathroom humidity. For framed options, aluminum channels mount similarly, but follow the manufacturer’s layout precisely because the frame must sit perfectly square or the glass won’t slide smoothly.
Sealant application is often overlooked, but it’s critical. After installation, run a bead of silicone caulk (not acrylic, it breaks down in showers) along any seams where the guard meets the floor or walls. This prevents water from seeping behind the guard and undermining your install. Let caulk cure fully, typically 24 to 48 hours, before using the shower. If you’re uncertain about drilling into tile or drilling through hard surfaces, hire a professional for the anchoring work: a crooked install wastes material and doesn’t function properly. Resources like Family Handyman and The Spruce offer step-by-step installation guides if you need visual reference. Also consider wet room design principles from established home improvement sources to ensure your splash guard integrates well with your overall bathroom layout.
Maintenance and Long-Term Care
A splash guard that’s properly installed and regularly maintained will serve you for 10+ years without failure. The glass itself is durable, tempered glass doesn’t degrade unless it’s physically impacted. What wears first is usually the hardware (hinges, clamps, fasteners) and the caulk seals. After every few showers, squeegee the glass to remove excess water and soap residue: this prevents mineral buildup that becomes hard to clean later. Use a microfiber cloth and a 50-50 mix of white vinegar and water for weekly cleaning, it dissolves hard water deposits without scratching glass. Avoid abrasive scrubbers or acidic cleaners like bar toilet bowl cleaner, which can etch glass over time.
Check your caulk seals quarterly. If you notice cracking, mold growth, or separation where the guard meets the floor, it’s time to re-caulk. Remove old caulk with a caulk removal tool or plastic scraper (metal scrapes tile), then reapply fresh silicone. This small maintenance task prevents water from creeping behind your guard and damaging the subfloor. If hinges become loose or squeaky, tighten fasteners and apply a small amount of silicone-based lubricant (not WD-40, which attracts dust). Pivot hinges occasionally need replacement after years of daily use, hardware kits usually run $40 to $150 and are a weekend project if the original anchors are still sound. Keep your bathroom ventilation running during and for 20 to 30 minutes after showers to reduce humidity and prevent mold around the guard edges. These small habits keep your splash guard looking and functioning like new.